How it works
Here I am, hard at work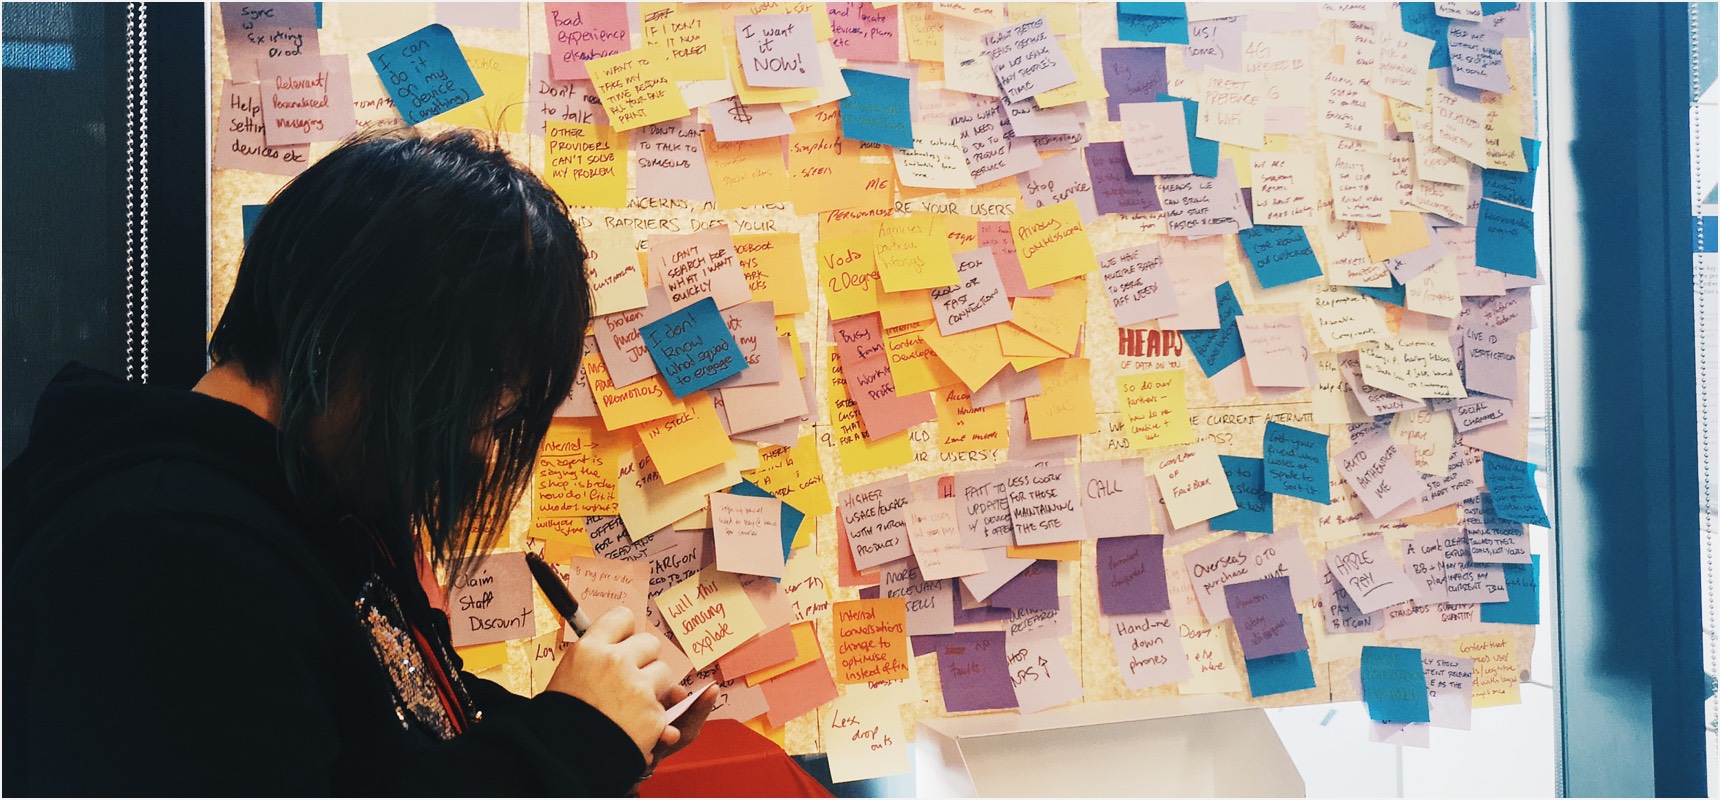 STEP ONE
Research and the User-centered design canvas (UCDC)
When receiving an idea for a project, the first step is to look at it critically. This is to identify the reason for design - it could be to improve an experience, bring an innovation, or solve a problem.
This can be achieved through thorough research and discovery, after which the insights can be applied to a design tool called the UCDC. This will focus understanding, and give everyone on the team context and a common understanding of why this piece of work needs to be done, and the value that it will bring.
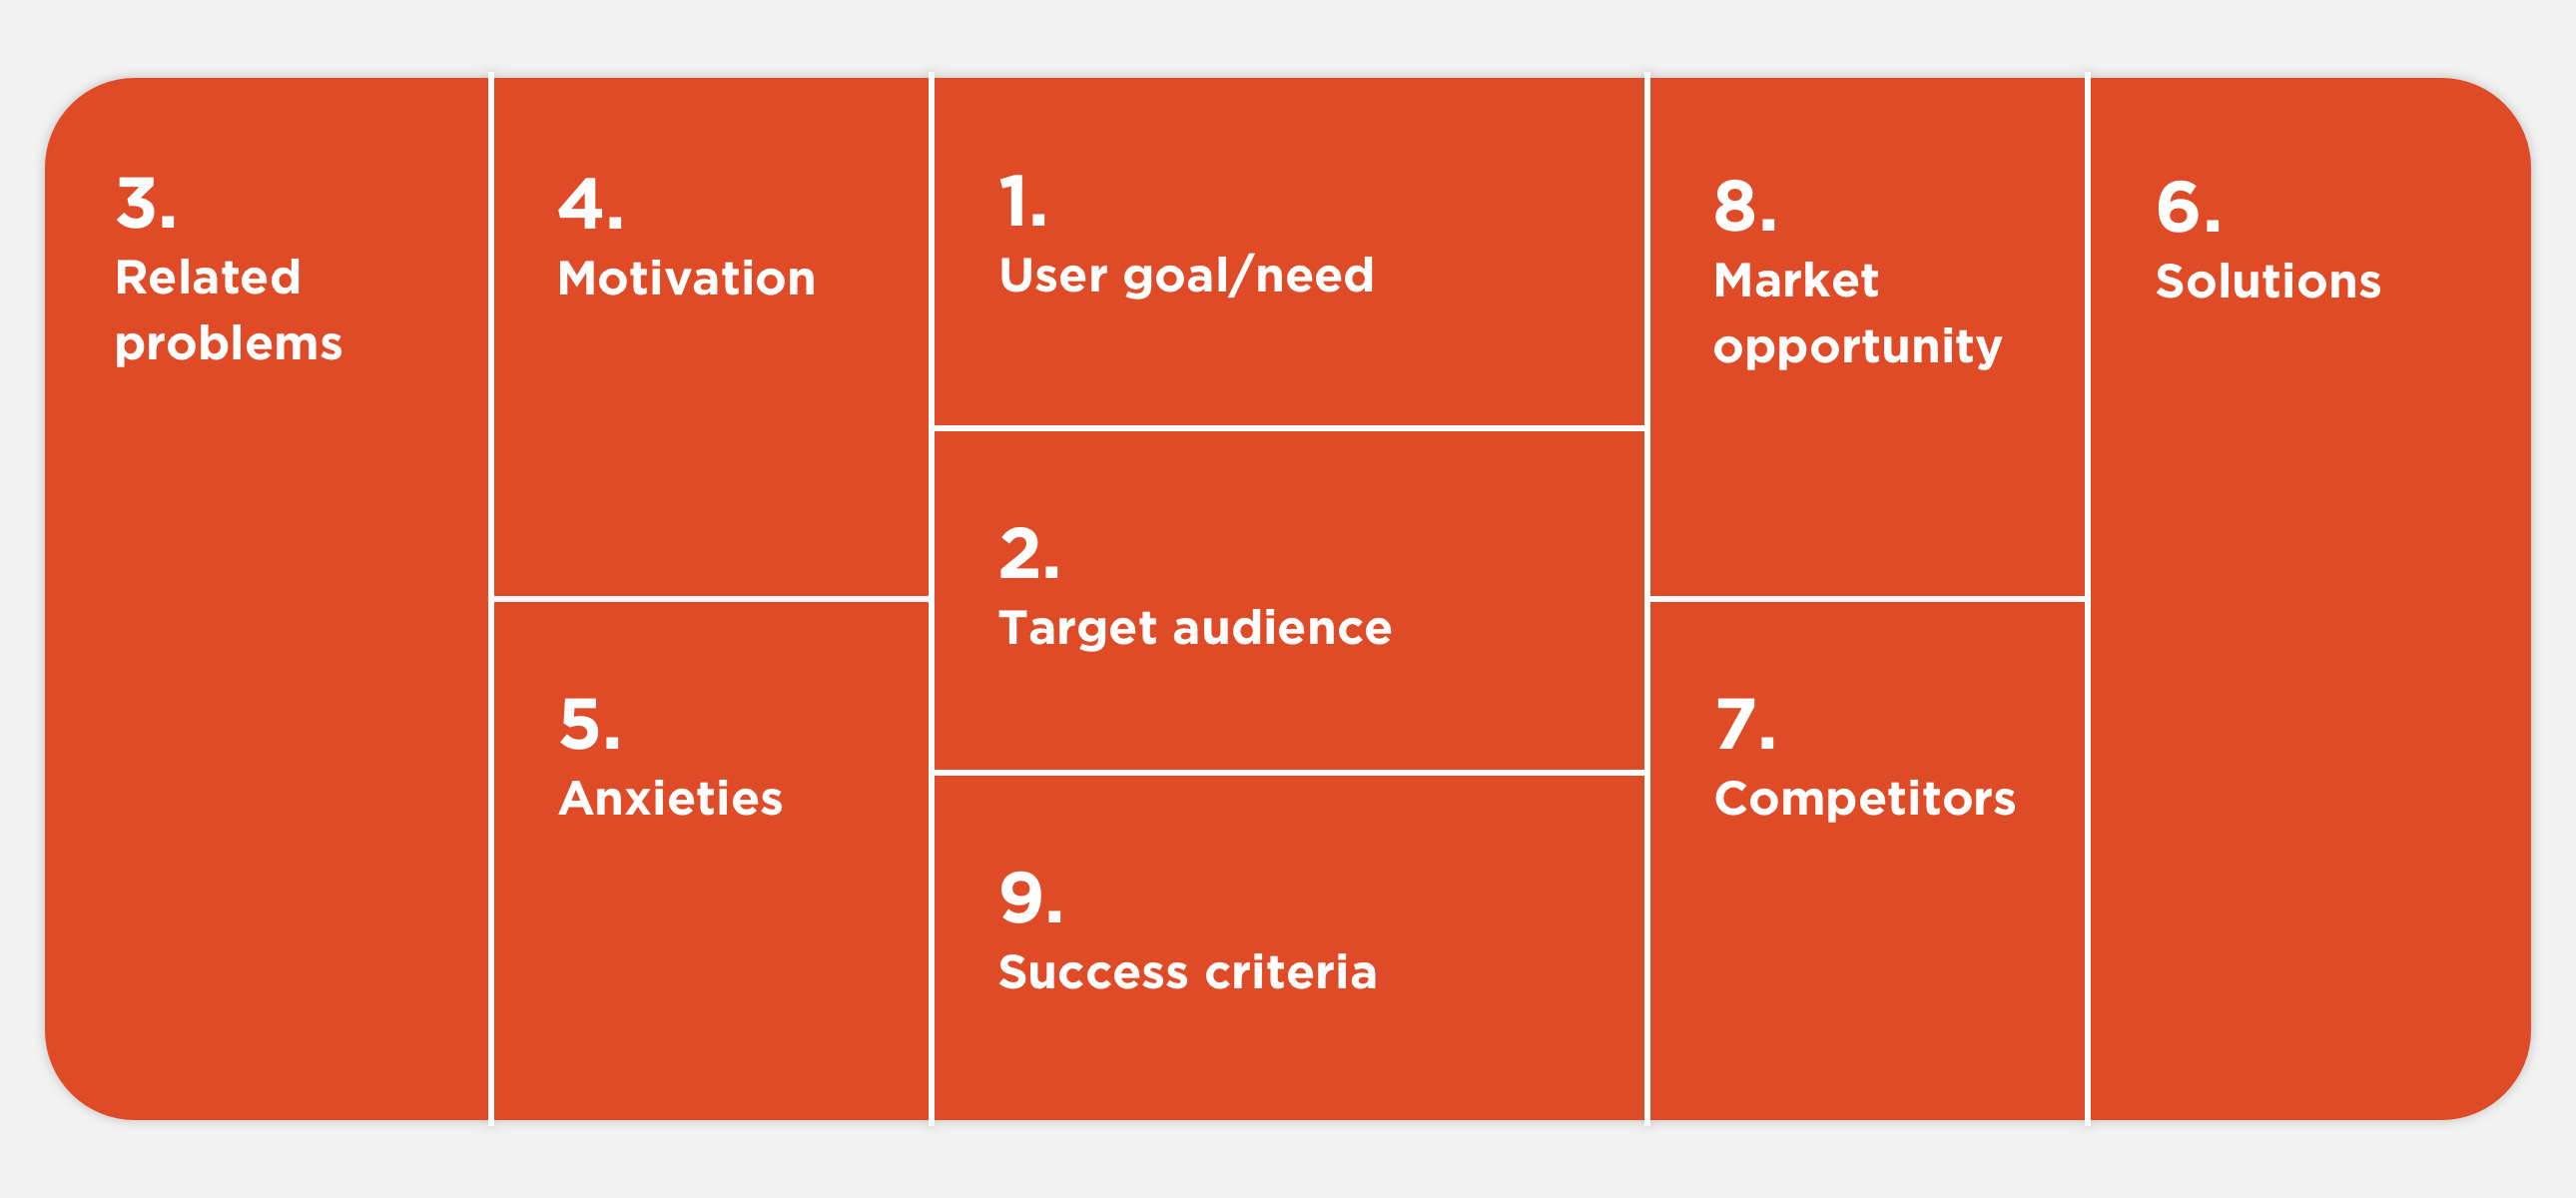
The user-centered design canvas (UCDC) is a tool used to help evaluate:- Desirability: user need, problem, or willingness to search for a solution
- Viability: should the solution be implemented, is there a market opportunity/gap or a business need
- Feasibility: can the solution be implemented, is there capability for it
1.
User goal/needThe user's core/fundamental goal or need.
2.
Target audienceKey targeted users that will have the user goal/need.
3.
Related problemsOther related problems that could be solved alongside the core need.
4.
MotivationTriggers that would cause the user to seek a solution.
5.
AnxietiesConcerns that would stop the users.
6.
SolutionsWays that will allow the user to address their core need and problems.
7.
CompetitorsOther choices or solutions already in the market.
8.
Market opportunityThe competitive advantage.
9.
Success criteriaMetrics or targets to know the core need or problem has been met or solved.
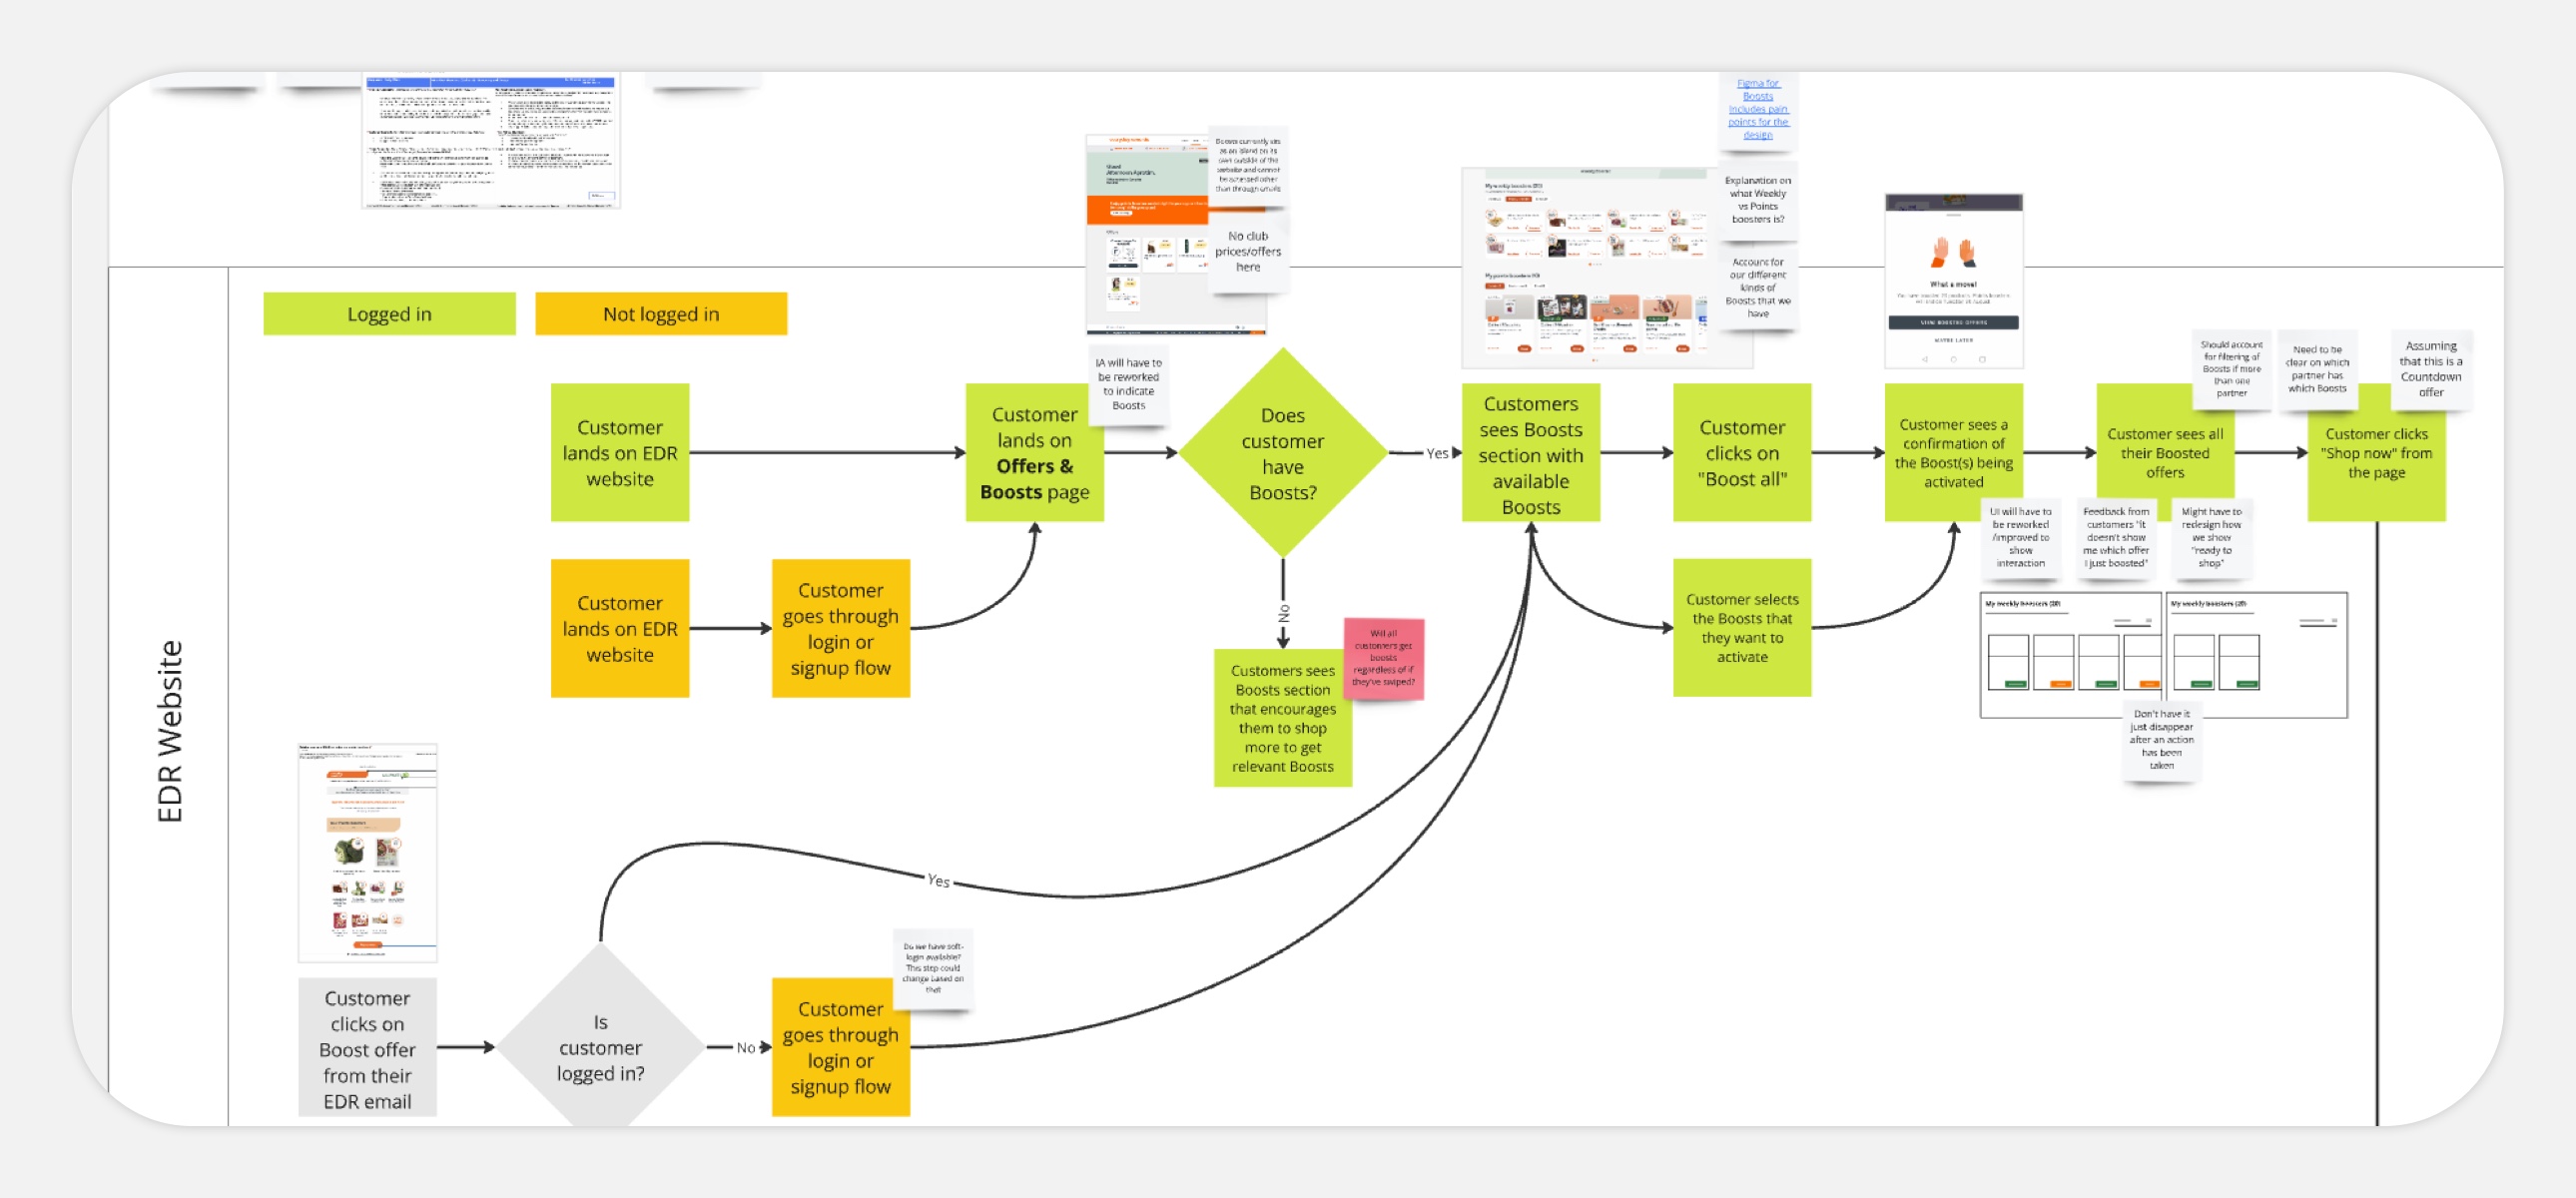
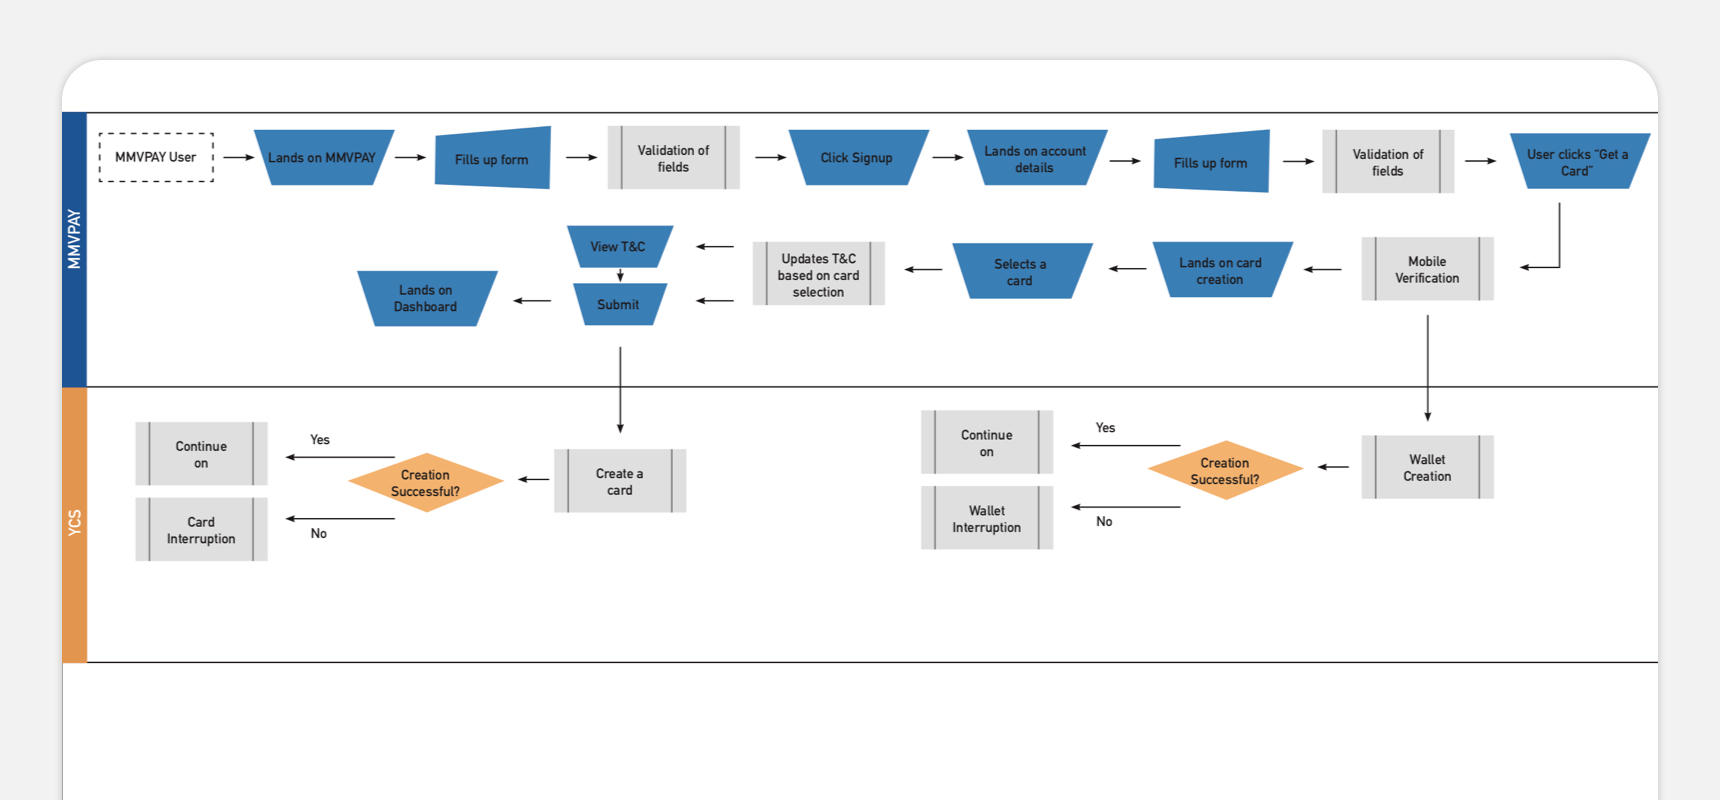
End to end user journey mapping
E2E user journey mapping serves to account for a holistic user journey, and is also helpful as a source of truth for the team when referring back to the overall journey.
In order to achieve a comprehensive journey map and identify gaps where present, E2E journey mapping is used in conjunction with frameworks such as JUCCI (Join, Use, Care, Change, Involve). Frameworks used can be constructed and customized depending on the product or business.
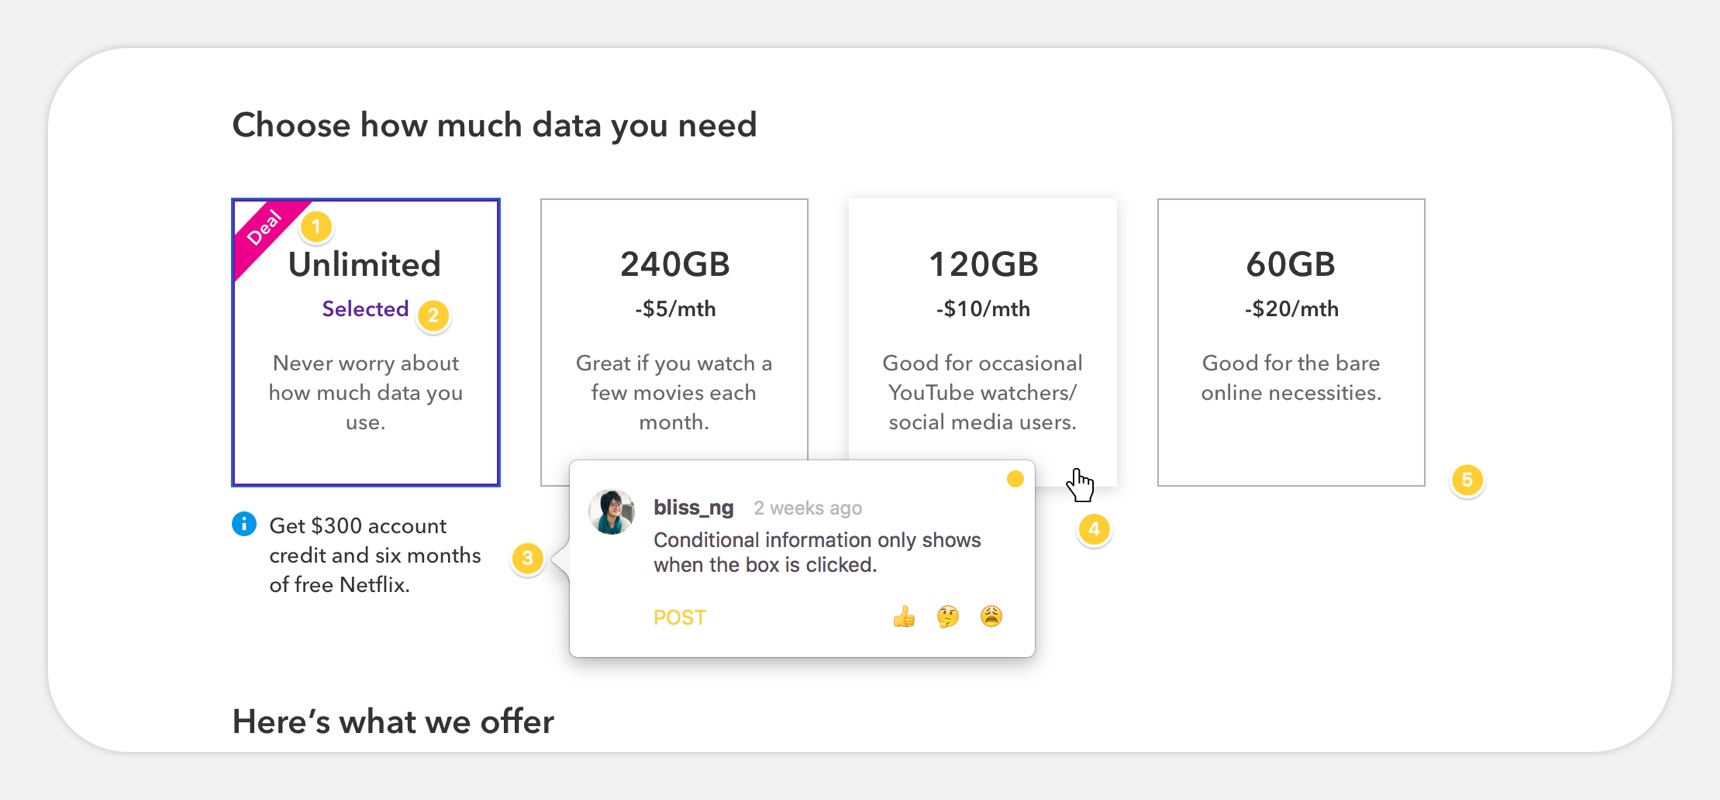
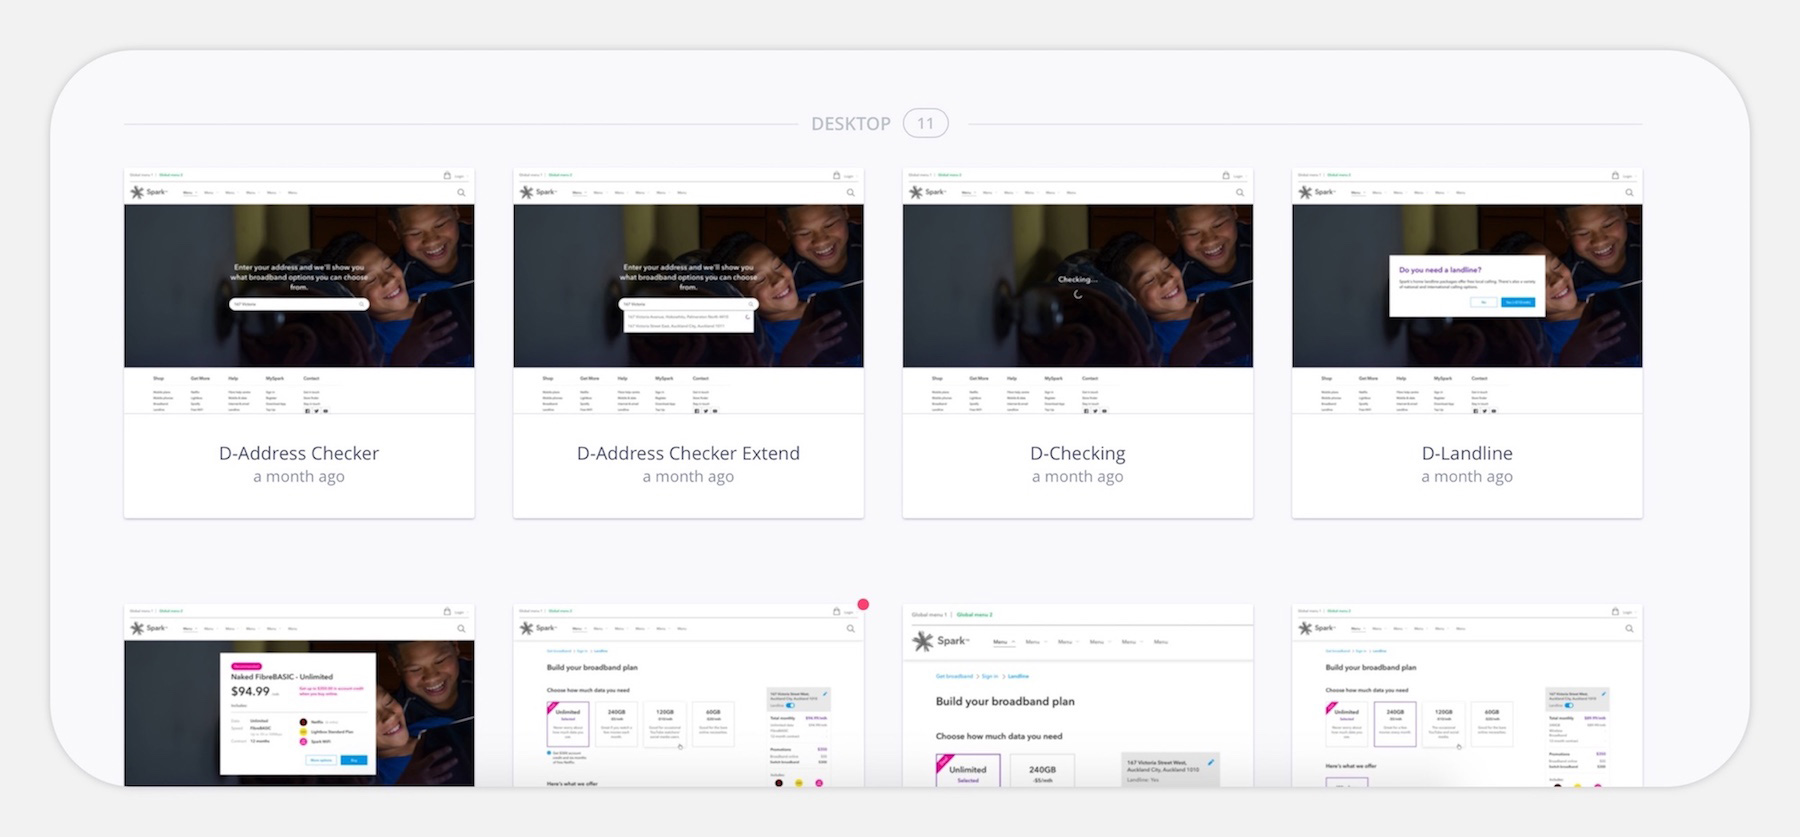
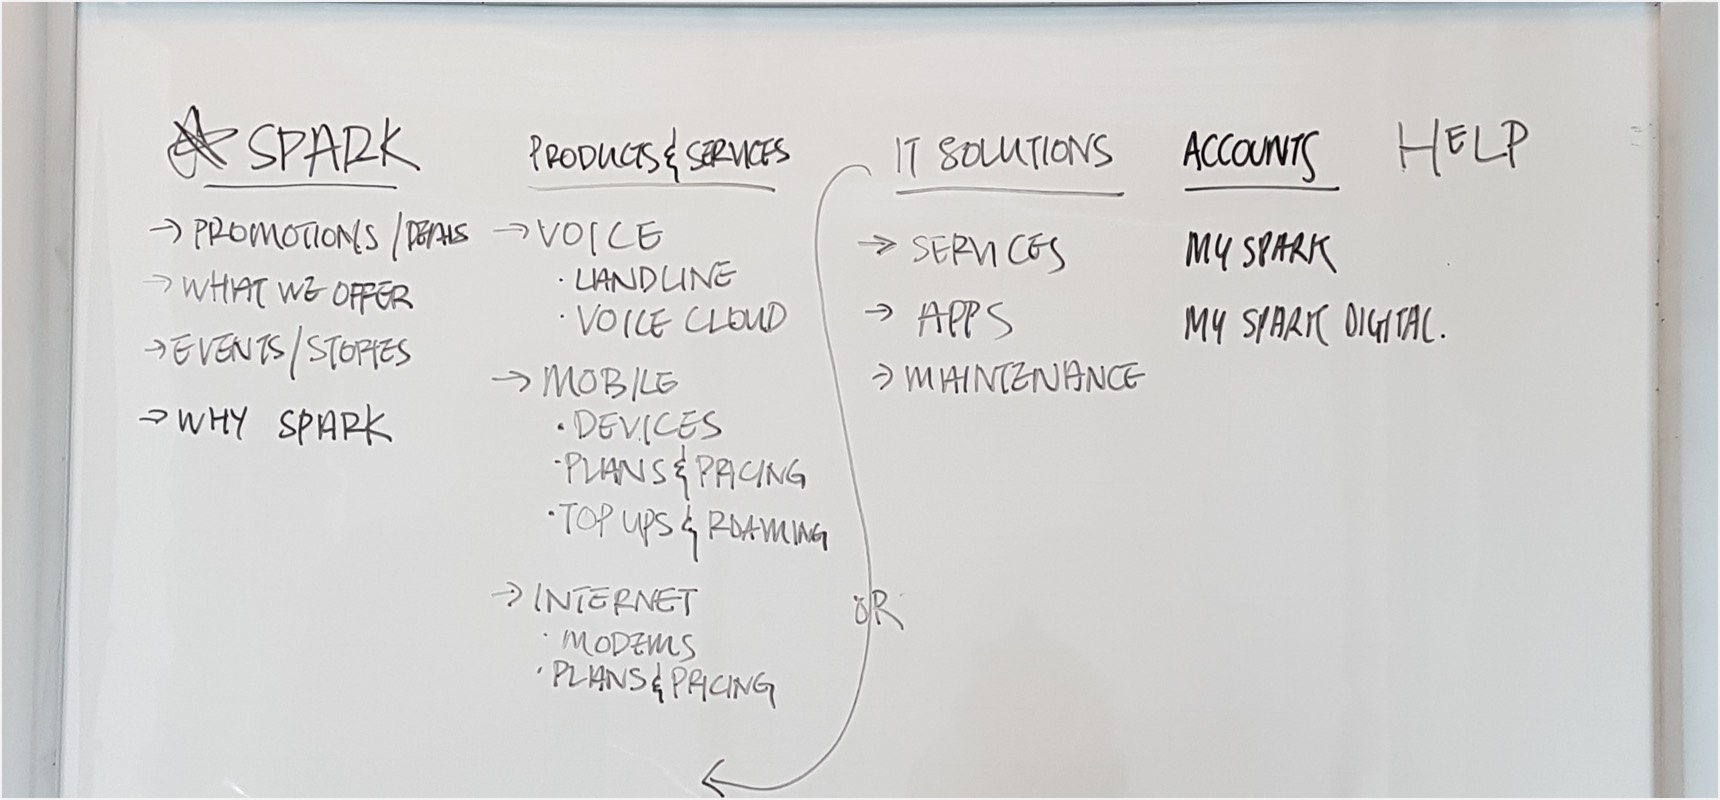
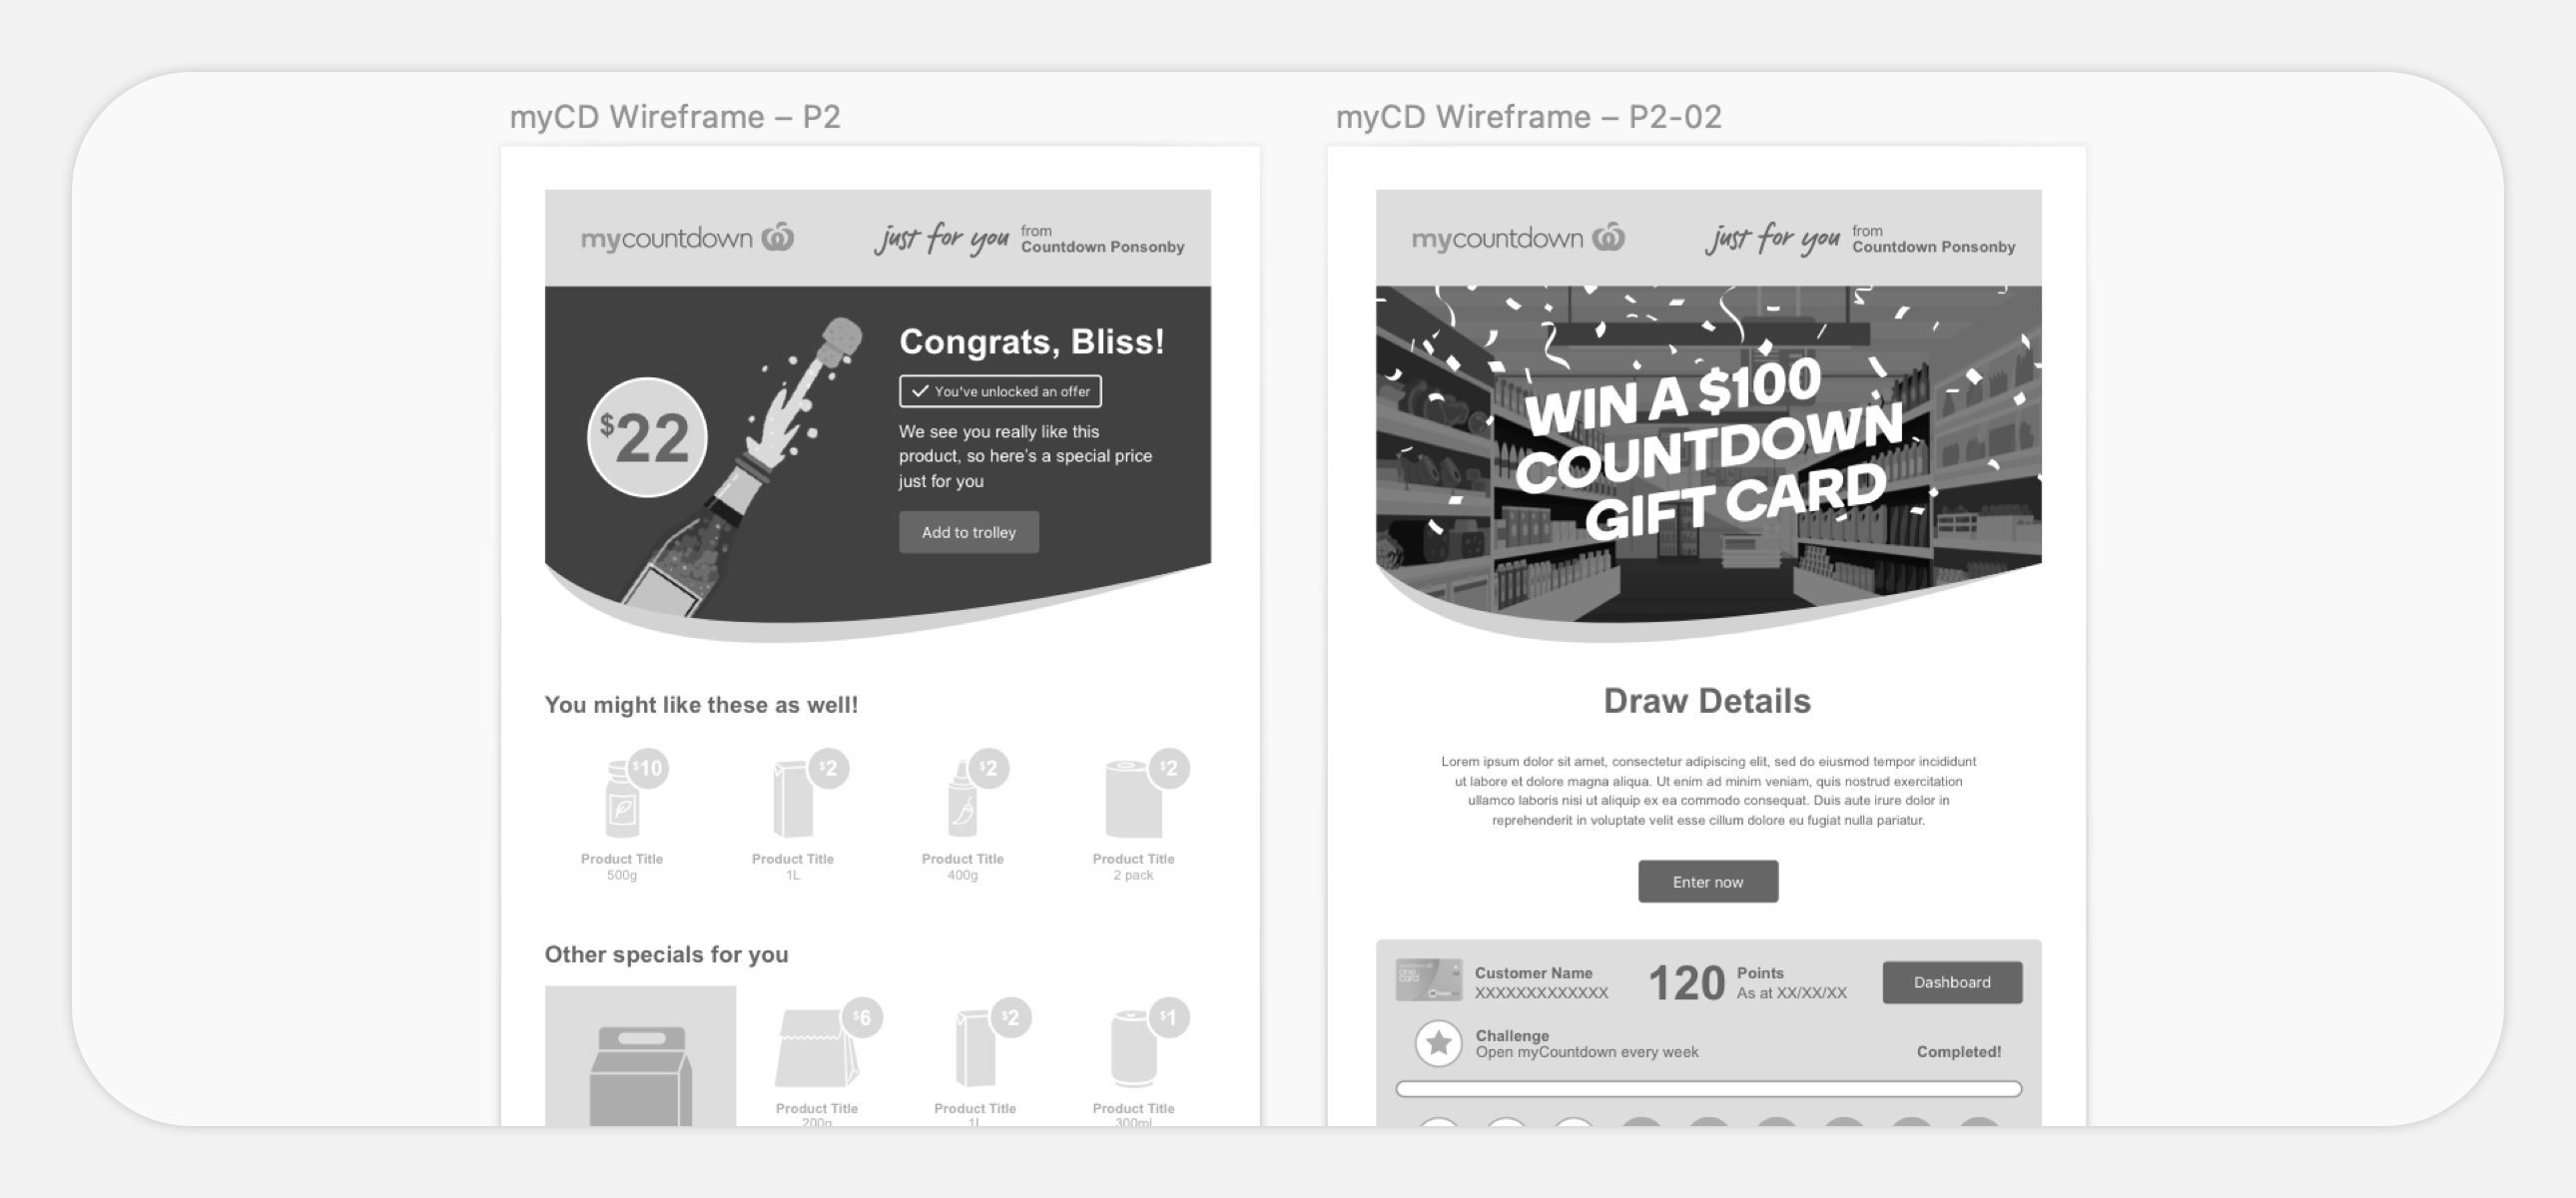
IA, sketches and wireframes
This consists of high level concepts which can include:- Information architecture: high level site IA, site map, high level page IA, etc.
- Sketches: pen on paper to ideate and rapidly produce first drafts to be refined, and which can be presented to the team to gather initial feasibility feedback
- Wireframes: Clean paper sketches or basic low fidelity digital wireframes ready for testing

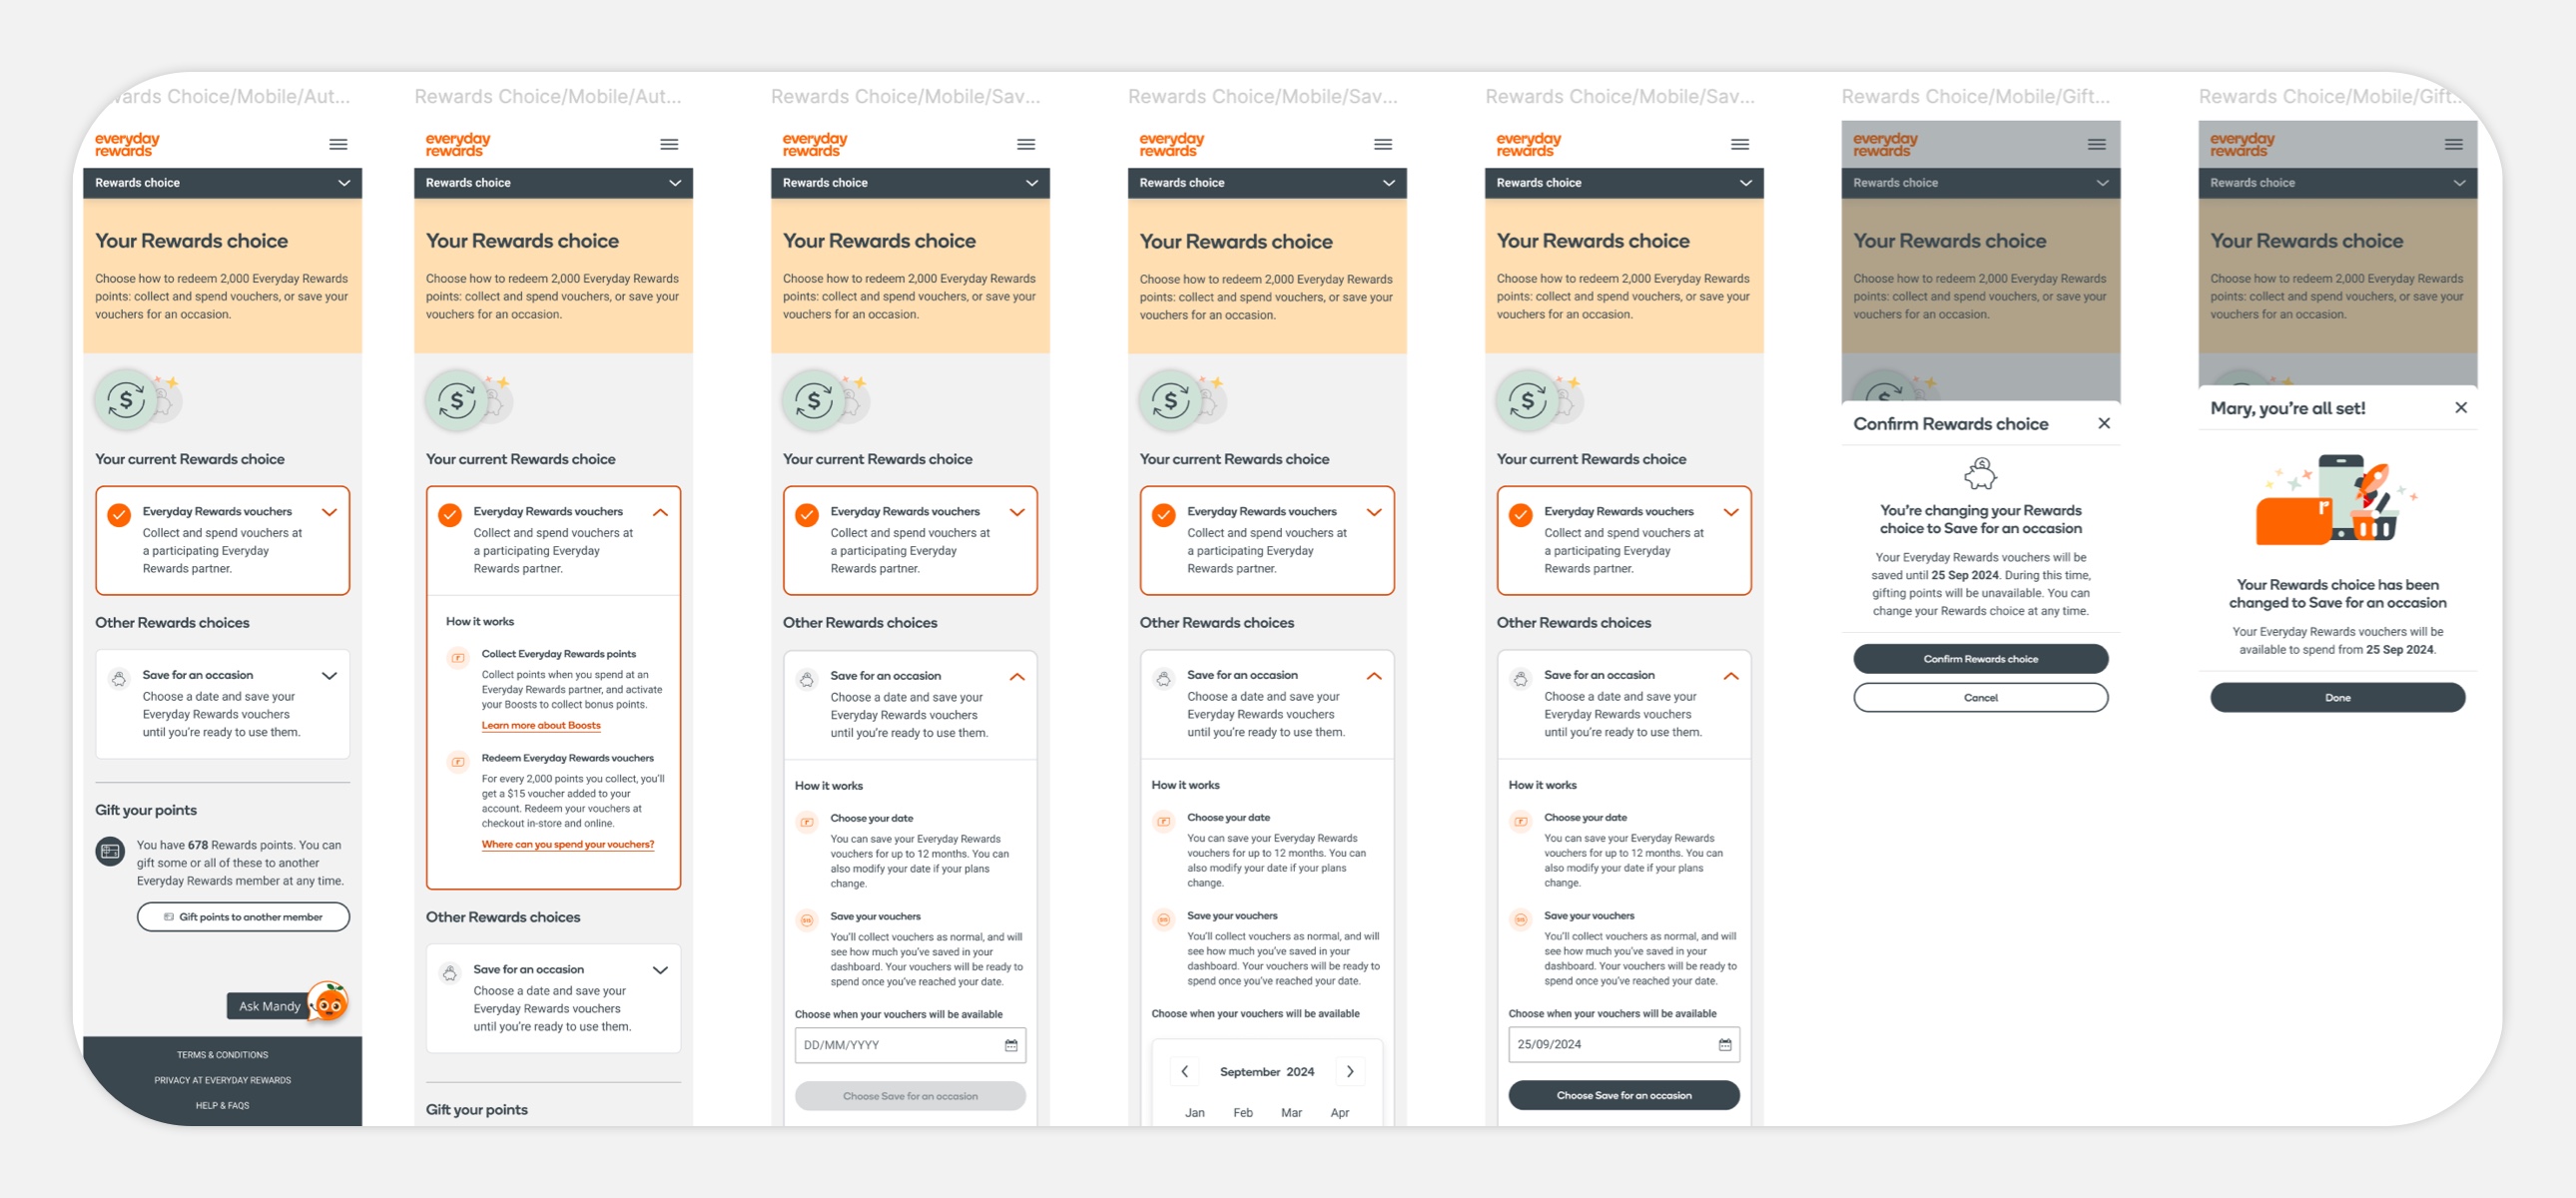
Prototyping and testing
This will refine concepts and gather valuable feedback from potential users. Different projects will require different types of testing, which could include facilitated testing, remote testing, surveys, or A/B testing. Some components of preparing a user test could be:1.
Defining the purposeThe goal and scope of the test.
2.
Choosing a test methodThe most effective way to test.
3.
Crafting test script (if required)A test script guides the test.
4.
Rapid prototyping (if required)This could be paper or low-fidelity digital wireframes.
5.
Test iterations (if required)Quick and small iterations across test sessions.
6.
Feedback loopGathering feedback, interpreting results, and implementing changes.
A report is usually generated after the user test, with a summary of the conducted test, key insights, details which could include a page-by-page breakdown of the prototype, and recommended next steps.
STEP FIVEUser interface and interaction design
When the concept has been tested and proven, the process moves on to detailed design that incorporates insights from the test, including:- User interface design and presentation of visual components
- Interaction design and determining the behavior of components
- Further refining of the IA
Handover
Communication is key in handing off the designs to the development team:- Involve them in the design process from the start
- Take them through the entire user journey that needs to be produced
- Use tools such Zeplin to mark points of interaction and notes